
Introduction to Baked Italian Sandwiches
Why Baked Italian Sandwiches are a Game Changer for Your Lunch Routine
If you're looking for a delicious twist on the classic sandwich, baked Italian sandwiches are here to elevate your lunch game! Imagine a cozy blend of salami, pepperoni, and chicken ham, embracing gooey melted cheese, all wrapped in flaky, buttery crescent dough. This recipe is not just about flavor; it's about convenience and versatility.
Gone are the days of making your lunch routine monotonous. These sandwiches are perfect for meal prep, allowing you to enjoy a savory Italian treat throughout the week. You can make a batch over the weekend, slice them into smaller portions for an easy appetizer, or serve them hot and melty for a satisfying dinner. Trust me, your taste buds will thank you!
Plus, with minimal preparation (just 10 minutes for prep), you can whip these up in no time. The baking process gives them that crispy, golden finish, making each bite addictive. Want to impress your friends or family at your next gathering? These sandwiches are a surefire crowd-pleaser.
So, why settle for a boring sandwich when you can indulge in these delightful baked Italian sandwiches? Let’s dive into the recipe and bring a little Italian flair to your table!

Ingredients for Baked Italian Sandwiches
Essential Ingredients You’ll Need
Creating your delicious baked Italian sandwiches starts with a few key ingredients that bring flavor and heartiness to this dish:
- 2 tubes of refrigerated crescent dough: This flaky base is what makes our sandwiches so comforting!
- 6 oz. thinly sliced salami: A classic choice for that rich, savory taste.
- 6 oz. thinly sliced chicken ham: This adds a lovely depth without overwhelming the palate.
- 3 oz. thinly sliced pepperoni: Perfect for those who crave a little spice.
- 8 oz. thinly sliced mozzarella cheese: You can opt for provolone too; either will melt beautifully.
Optional Ingredients for Extra Flavor
Want to elevate your baked Italian sandwiches even more? Consider these optional add-ins:
- Pickled peppers: For a tangy kick.
- Olive oil: Drizzling this on top before baking enhances the flavor.
- Grated Parmesan cheese: A sprinkle can add an extra savory note.
- Italian seasoning: Just a teaspoon can infuse your sandwiches with aromatic herbs.
Feel free to mix and match these ingredients based on your personal preferences! Check out more about the importance of using fresh ingredients here. Happy cooking!
Step-by-step Preparation for Baked Italian Sandwiches
Making baked Italian sandwiches is an experience that brings the comforting tastes of Italy straight to your kitchen. Let's guide you through each step of preparing these delicious sandwiches so you can impress your friends and family at your next gathering or simply enjoy them during a cozy evening at home.
Gather Your Equipment and Ingredients
Before diving into the cooking, it’s essential to get all your equipment and ingredients organized. Here’s what you’ll need:
- 9x13-inch metal pan: This is perfect for baking and ensures even cooking.
- Ingredients:
- 2 (8 oz. each) tubes of refrigerated crescent dough
- 6 oz. thinly sliced salami
- 6 oz. thinly sliced smoked chicken ham
- 3 oz. thinly sliced pepperoni
- 8 oz. thinly sliced mozzarella cheese (or provolone)
- Optional: pickled peppers for added zest
You can substitute ingredients based on your preference—just be sure to keep the core flavors intact. For instance, you can explore alternatives to crescent dough if you want a gluten-free option.
Preheat Your Oven and Prepare Your Dish
Now that you have everything ready, it’s time to get your oven to work! Set your oven to preheat at 350°F (175°C). While it heats, lightly grease your metal pan to ensure your sandwiches come out easily without sticking. This initial step is crucial for preventing a cooking disaster, trust me!
Layer the Crescent Dough and Fillings
Once your oven is preheated, unroll one sheet of crescent dough, layering it on the bottom of the greased pan. You'll want to bake this for about 10 minutes until it’s set but not browned. After you remove it from the oven, start layering. First, sprinkle half of your cheese, then add salami, smoked chicken ham, pepperoni, and if you like, some pickled peppers for a delightful kick. Finish with the remaining cheese before carefully placing the second crescent dough sheet on top.
Add Those Flavorful Toppings
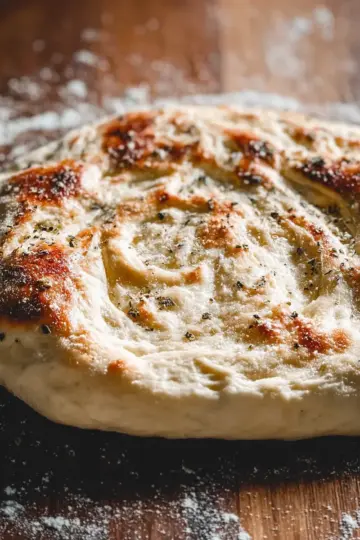
Who doesn’t love a flavorful topping? Mixing together olive oil, grated Parmesan cheese, and Italian seasoning creates a perfect drizzle to enhance your sandwich’s flavor profile. Brush this mixture over the top layer of dough for a golden finish that’s hard to resist. It's little touches like these that make the difference between a good sandwich and an unforgettable one!
Bake and Perfect Your Sandwiches
Now it’s showtime! Pop the pan back in the oven and bake for 20 minutes until golden brown. Pro tip: Increase the oven temperature to 375°F (190°C) for the last 5 minutes, but avoid opening the door. This helps you achieve a perfectly crispy top layer, giving your baked Italian sandwiches that ultimate appeal.
Once they’re fresh out of the oven, let them rest for about 5 minutes before slicing. This step ensures melted cheese doesn’t ooze everywhere when you cut into them. Serve warm and enjoy directly, or consider slicing them smaller for an impressive appetizer at your next gathering!
Embrace the delightful transformation of simple ingredients into an amazing meal. Happy baking!

Variations on Baked Italian Sandwiches
Veggie-Packed Italian Sandwiches
If you’re looking to spice up the classic baked Italian sandwiches, try adding a medley of colorful veggies! Roasted bell peppers, grilled zucchini, and fresh spinach create vibrant layers that enhance flavor and nutrition. You could even throw in some artichoke hearts or olives for a Mediterranean twist. Just remember to reduce the amount of meat slightly, keeping the balance right. Your veggie lovers will thank you!
Spicy Italian Sandwiches with Peppers
For those who crave a bit of heat, spicy peppers can elevate your baked Italian sandwiches to the next level. Consider using jalapeños or banana peppers to kick things up a notch. The combination of spiciness with the melty cheese creates a delightful contrast that’s perfect for adventurous eaters. Pair with a refreshing side salad or a chilled drink to balance the spice!
Cooking Tips and Notes for Baked Italian Sandwiches
Best Practices for Ensuring Crispiness
To achieve the perfect crispy texture for your baked Italian sandwiches, start by pre-baking the bottom layer of crescent dough as indicated in the recipe. This step allows it to firm up and prevents sogginess from the filling. For an extra crunch, brush a mixture of olive oil, grated Parmesan cheese, and Italian seasoning on the top dough layer before baking. Elevating the temperature towards the end also ensures that golden crust we all crave!
Storage Tips to Keep Your Sandwiches Fresh
If you have leftovers, store the baked Italian sandwiches in an airtight container in the fridge for up to three days. To reheat, pop them in the oven instead of the microwave; this maintains the crisp texture. If you’re looking to freeze, slice them into individual portions, wrap them tightly in foil, and they can last up to a month! Check out The Kitchn for more tips on freezing sandwiches.

Serving Suggestions for Baked Italian Sandwiches
Perfect Pairings for Your Sandwiches
To elevate your baked Italian sandwiches, consider pairing them with a refreshing side salad, such as a classic Caesar or a simple arugula with lemon vinaigrette. For a heartier option, accompany with crispy sweet potato fries or garlic bread. You might also enjoy a flavorful dipping sauce, like homemade marinara or a spicy aioli, to bring out the richness of the cheese and meats.
How to Serve for a Crowd
Hosting a gathering? Serve baked Italian sandwiches cut into smaller squares for easy handling. Place them on a large platter, alongside an assortment of pickled peppers and olives for a beautiful presentation. For drinks, opt for sparkling water or iced tea to keep everyone refreshed without overdoing it. These sandwiches can be made ahead and reheated, ensuring your hosting duties are manageable and fun! Check out The Kitchn for more party-ready ideas.
Time Breakdown for Baked Italian Sandwiches
Preparation Time
Getting started on these baked Italian sandwiches is a breeze! With just 10 minutes of prep time, you can gather your ingredients and layer them into the pan.
Cooking Time
Once you're all set, these cheesy creations need about 35 minutes in the oven. That includes a quick bake for the bottom layer followed by a longer bake to get everything perfectly golden and melty.
Total Time
In just 45 minutes, you’ll go from kitchen novice to gourmet sandwich chef! Perfect for a satisfying lunch, dinner, or even an appetizer, these sandwiches are sure to wow your guests. So, are you ready to dive into this delicious journey?
Nutritional Facts for Baked Italian Sandwiches
Calories per Sandwich
Each serving of these Baked Italian Sandwiches packs about 641 calories. A delightful choice whether you're enjoying lunch or hosting a casual dinner!
Protein Content
You'll find 26 grams of protein in each sandwich, thanks to the combination of chicken ham, salami, and cheese. This hearty protein punch helps keep you full and energized throughout the day.
Sodium Levels
While these sandwiches are delectable, they do come with 2091 mg of sodium per serving. It’s wise to balance your meal with low-sodium sides or salads. For tips on reducing sodium in your diet, consider checking out resources from the American Heart Association.
Enjoy these tasty sandwiches with awareness, and don’t forget to share them at your next gathering!
FAQs about Baked Italian Sandwiches
Can I make these sandwiches ahead of time?
Absolutely! You can prepare baked Italian sandwiches a day in advance. Assemble the sandwich layers as per the recipe but skip the baking step. Cover the assembled sandwich tightly with plastic wrap and refrigerate. When you're ready to serve, pop it in the oven. Just be sure to add a few extra minutes to the baking time!
What are some good side dishes to serve with these sandwiches?
These hearty sandwiches pair wonderfully with light sides. Consider serving them with:
- A crisp Caesar salad for a refreshing crunch.
- Marinated veggies or antipasto skewers for an Italian twist.
- Sweet potato fries or potato chips for that satisfying crunch.
How do I reheat leftovers without losing texture?
To ensure your baked Italian sandwiches retain their delicious crispiness, reheat them in the oven. Preheat your oven to 350°F, then place the sandwiches on a baking sheet. Cover with foil for the first 10 minutes, then uncover to allow for crisping. This method helps maintain the flaky texture while warming through.
For more tips on sandwich storage, check out this guide on storing sandwiches from the FDA!
Conclusion on Baked Italian Sandwiches
In conclusion, baked Italian sandwiches offer a delicious twist on the classic favorite. With their savory layers of meats and gooey cheese enveloped in flaky crescent dough, they’re perfect for any meal or casual gathering. Give this recipe a try and enjoy the warm, comforting flavors with friends and family!

Baked Italian Sandwiches
Equipment
- 9x13-inch pan (preferably metal)
Ingredients
Dough and Meats
- 2 tubes refrigerated crescent dough 8 oz. each
- 6 oz. thinly sliced salami
- 6 oz. thinly sliced smoked ham
- 3 oz. thinly sliced pepperoni
- 8 oz. thinly sliced Mozzarella cheese (or provolone)
- pickled peppers optional
Optional Topping
- 2 tablespoons olive oil
- 2 tablespoons grated Parmesan cheese
- 1 teaspoon Italian seasoning
Instructions
Preparation
- Preheat oven to 350°F. Lightly grease 9x13-inch pan.
- Layer one sheet of crescent dough on bottom of pan. Bake 10 minutes. Remove from oven and layer in this order: half the cheese, salami, ham, pepperoni, optional peppers, then rest of cheese. Top with other sheet of crescent dough.
- For the optional topping, combine the oil, Parmesan and Italian seasoning. Brush over the top layer of dough.
- Bake 20 minutes, then increase oven temperature to 375°F and bake an additional 5 minutes until golden and crispy.
- Remove from oven, let stand 5 minutes before slicing. Serve warm.


Leave a Reply