
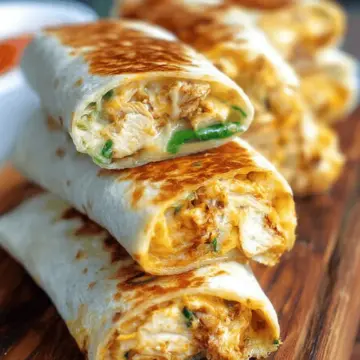
Introduction to Cheesy Garlic Chicken Wraps
If you're seeking a quick, satisfying meal that combines comfort food with high protein, look no further than cheesy garlic chicken wraps. These wraps are more than just a meal; they're a delightful experience! Perfect for lunch or dinner, they feature a wonderfully crispy exterior that gives way to a melty, garlicky center. The combination of chicken, cheese, and just the right amount of garlic creates a flavor explosion that will make your taste buds dance.
What makes cheesy garlic chicken wraps such a fantastic choice for busy professionals? For starters, they only take about 22 minutes from prep to plate, making them an excellent option for a hearty meal after a long day. Plus, you can easily customize them! Whether you prefer rotisserie chicken for convenience or want to use up leftovers from the fridge, the flexibility of this recipe allows you to adapt it with what you have on hand.
Head over to sites like EatingWell or Serious Eats for more ideas on high-protein meals and how to create delicious wraps. Trust me, these cheesy garlic chicken wraps will soon become a staple in your cooking repertoire!
Ingredients for Cheesy Garlic Chicken Wraps
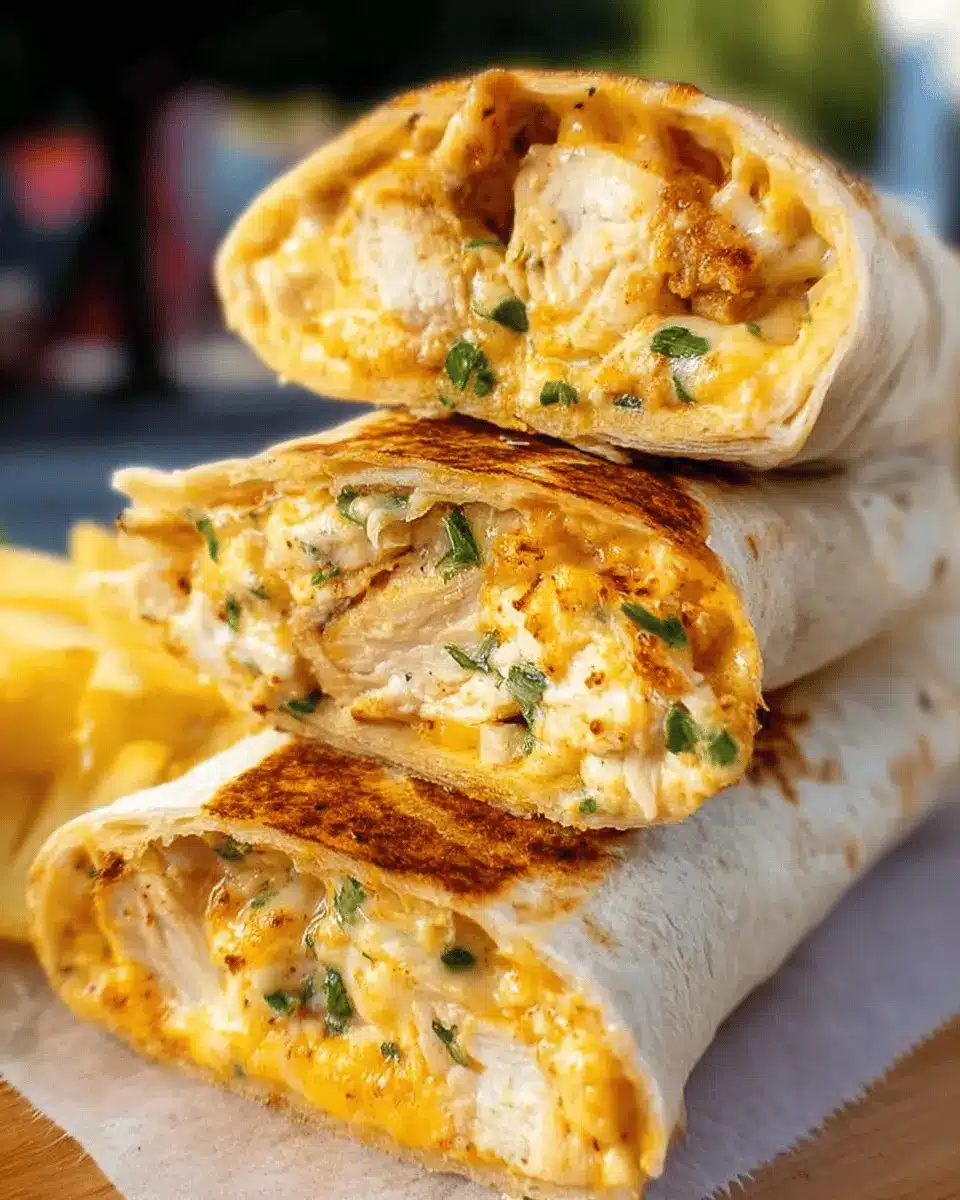
Essential ingredients for cheesy garlic chicken wraps
Creating these mouthwatering cheesy garlic chicken wraps is a breeze when you have the right essentials. Here's what you'll need:
- 2 large tortillas (regular or low-carb/high-protein for a health boost)
- 7 oz cooked chicken (about 200 grams, chopped – rotisserie chicken works perfectly)
- 2 garlic cloves (minced or grated; adjust to your garlicky preference)
- 2 tablespoons light mayonnaise
- 1 tablespoon light Greek yogurt (adds creaminess and protein)
- 2 teaspoons hot sauce (like Frank’s for a kick)
- ¼ teaspoon salt (to enhance all the flavors)
- 3 oz grated cheese (about 90 grams; a cheddar blend is delicious)
- 1 green onion (chopped for a fresh crunch)
- Olive oil spray (for that golden crispiness)
Optional add-ins for extra flavor
Want to elevate your cheesy garlic chicken wraps a bit more? Consider including these optional ingredients:
- Fresh herbs like cilantro or parsley for a burst of freshness
- Sliced jalapeños for an extra heat kick
- Diced bell peppers for a crunchy texture
- Sour cream or guacamole on the side for dipping
- Avocado slices can add creaminess and healthy fats
Feel free to mix and match for your personal taste! These versatile wraps work well with various ingredients, allowing you to get creative in the kitchen. For more ideas, check out this source for inspiration!
Preparing Cheesy Garlic Chicken Wraps
When you’re craving something delicious yet easy to make, cheesy garlic chicken wraps are the perfect solution. You'll love how quickly they come together, and the combination of flavors is simply irresistible! Let's break down the steps to ensure you nail this comforting meal.
Gather and Prepare Your Ingredients
To kick things off, gather all your ingredients. Here’s what you’ll need:
- 2 large tortillas (feel free to pick regular or low-carb/high-protein)
- 7 oz cooked chicken, chopped (rotisserie chicken works wonders)
- 2 minced garlic cloves (adjust based on your love for garlic)
- 2 tablespoons light mayonnaise
- 1 tablespoon light Greek yogurt or plain yogurt
- 2 teaspoons hot sauce (try Frank’s for some kick)
- ¼ teaspoon salt
- 3 oz grated cheese (cheddar blend adds great flavor)
- 1 chopped green onion
- Olive oil spray
Have everything on hand before you start cooking—this makes the process smooth and enjoyable!
Mix the Chicken Filling
In a mixing bowl, combine your chopped chicken, minced garlic, light mayonnaise, Greek yogurt, hot sauce, and salt. Use a fork to mix it all together until combined. This creamy mixture will form the heart of your wraps. You might want to taste a spoonful and see if it needs more garlic or hot sauce!
Assemble the Cheesy Garlic Chicken Wraps
Now for the fun part—assembly! Lay out one tortilla on a clean surface. At the lower third of the tortilla, sprinkle about 2 tablespoons of grated cheese. Next, add roughly ⅔ cup of your chicken filling right on top. Finish it off with another tablespoon of cheese and a sprinkle of the chopped green onion for freshness.
Carefully fold in the sides of the tortilla, then roll it up tightly from the bottom. This helps keep all that delicious filling securely tucked away.
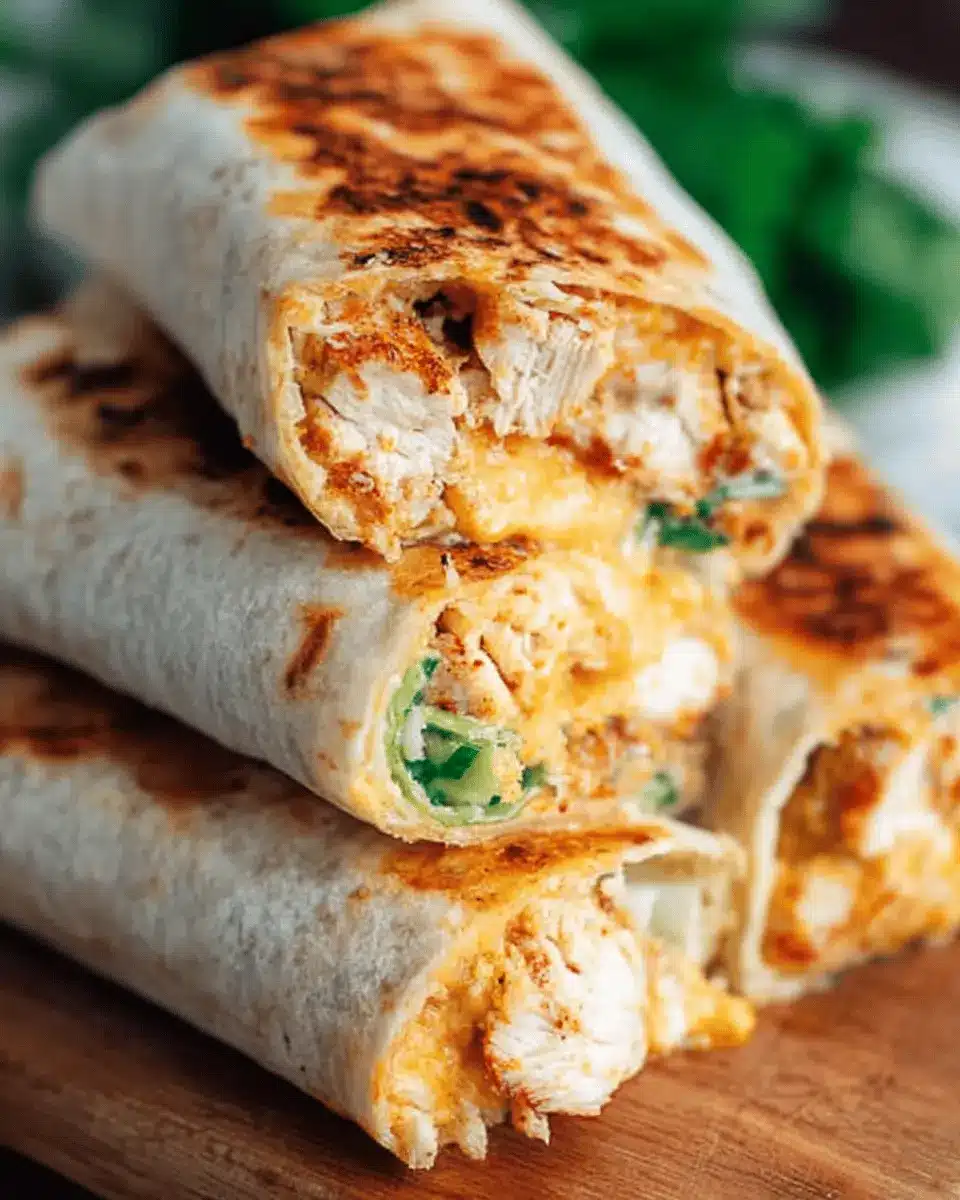
Cook the Wraps to Golden Perfection
Heat a non-stick pan over medium-high heat and spray it lightly with olive oil. Place the wraps seam-side down into the pan. Cook each side for about 3 to 4 minutes until they turn golden brown and crispy. Covering the pan with a lid while cooking can help melt that cheese perfectly and warm the filling faster.
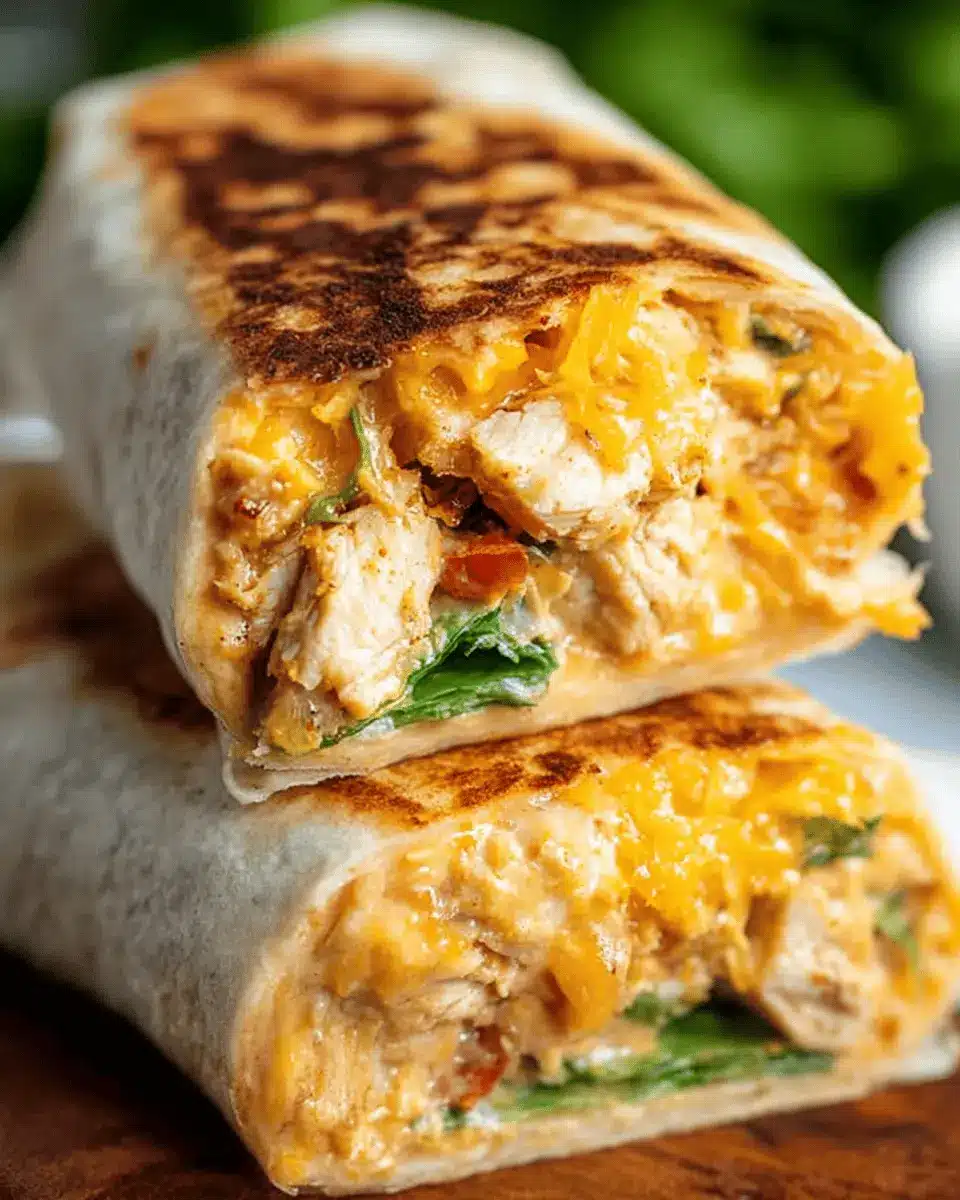
Slice and Serve Your Delicious Wraps
Once cooked, remove the wraps from the pan and slice them in half. This not only makes for a great presentation but also releases that aromatic steam from the gooey inside. Serve them up on a plate, perhaps accompanied by a big crunchy salad or some salsa on the side for dipping.
These cheesy garlic chicken wraps not only make for a hearty meal but are perfect for lunch on the go. You’ll find yourself turning to this recipe time and time again!
Variations on Cheesy Garlic Chicken Wraps
Cheesy Buffalo Chicken Wraps
If you’re feeling adventurous, try cheesy buffalo chicken wraps for a spicy twist! Simply use shredded buffalo chicken instead of the classic garlic chicken. You can mix the chicken with hot sauce for that perfect kick. Top it off with extra cheese for that melty goodness and add some crisp lettuce for crunch. This variation is not just a meal; it’s a flavor explosion that will leave your taste buds dancing.
Vegetarian Cheesy Garlic Wraps
For a meatless option, make vegetarian cheesy garlic wraps. Replace the chicken with sautéed veggies like bell peppers, mushrooms, and spinach. Incorporate cream cheese or ricotta for creaminess, and, of course, don’t skimp on the garlic. Top with your favorite cheese blend and bake or fry until crispy. This delightful twist ensures everyone gets to indulge in cheesy garlic goodness, regardless of their dietary choices.
Want more ideas? Check out these wrap variations for inspiration!
Cooking notes for Cheesy Garlic Chicken Wraps
Tips for achieving the ideal crispiness
To get that perfectly crispy exterior on your cheesy garlic chicken wraps, opt for a non-stick pan and use a light spray of olive oil to prevent sticking. Cooking over medium-high heat allows for quick browning. Flip the wraps gently and cover them with a lid to ensure the filling heats through without burning the tortillas.
Make-ahead and storage suggestions
For a hassle-free meal prep, prepare your chicken filling a couple of days in advance. Store it in an airtight container in the fridge. Once ready to enjoy, wrap and cook your cheesy garlic chicken wraps. If you have leftovers, refrigerate them for up to two days and reheat in a skillet or air fryer to regain that delightful crispiness. For extended storage, consider freezing just the filling for up to a month. You can also use it in various dishes like quesadillas or on top of baked potatoes for a delicious twist.
Want even more storage tips? Learn about other meal prep ideas here.
Serving suggestions for Cheesy Garlic Chicken Wraps
Accompaniments that complement the wraps
These cheesy garlic chicken wraps are deliciously satisfying on their own, but serving them with a few thoughtful accompaniments can elevate your meal. Try pairing them with:
- A bright, crunchy salad featuring mixed greens, cherry tomatoes, and a zesty vinaigrette.
- Roasted veggies like zucchini, bell peppers, or carrots, tossed in olive oil and herbs for added depth.
- Pickles or pickled onions for a tangy contrast that balances the richness of the cheese.
Creative dipping ideas
When it comes to dipping, think outside the box! Consider these tasty options:
- A creamy ranch dressing or a homemade yogurt-based dip can add a cooling element.
- Salsa verde or classic tomato salsa brings a fresh twist that complements the garlic nicely.
- For those who enjoy a kick, a spiced hot sauce would match the wraps' flavor profile perfectly.
Experiment with what you love, and enjoy the balance of flavors!
Time details for Cheesy Garlic Chicken Wraps
Preparation time
Getting ready for these cheesy garlic chicken wraps is a breeze! Set aside 15 minutes to gather your ingredients and prep the chicken filling. A quick mix of your ingredients will have you on your way.
Cooking time
Once you're ready to cook, you’ll spend just 7 minutes pan-frying those wraps until they reach that perfect golden brown. Make sure to keep an eye on them for that delightful crunch!
Total time
In no time, you’ll have these tasty wraps ready to devour, totaling only 22 minutes from prep to plate. Perfect for a quick lunch or a satisfying dinner option when you're pressed for time.
For more meal ideas, check out this guide on quick weeknight dinners. Enjoy your cooking!
Nutritional Information for Cheesy Garlic Chicken Wraps
When you're craving something tasty and satisfying, these Cheesy Garlic Chicken Wraps hit the spot! Here’s a glance at their nutritional benefits:
Calories
Each wrap contains approximately 476 calories, making it a hearty meal perfect for lunch or dinner without the guilt.
Protein
Packed with 38 grams of protein, these wraps are ideal for anyone looking to boost their protein intake. They’re great for fueling your day, whether you’re hitting the gym or tackling a busy schedule.
Sodium
With about 1090 mg of sodium, it's a good idea to enjoy these cheesy delights in moderation if you’re watching your salt intake. Pairing with fresh veggies can help balance things out.
These wraps deliver comfort in a convenient package. For more details on how to make them and tips on variations, check out the full recipe above! Discover more about building a balanced meal with protein-packed options from resources like Healthline and USDA Nutrition Data.
FAQs about Cheesy Garlic Chicken Wraps
Can I bake these wraps instead of frying?
Absolutely! If you prefer a baked option, simply preheat your oven to 400°F (200°C), place the wraps on a baking sheet, and bake for about 10–12 minutes, flipping them halfway through. While baking does keep things healthier, you might find that frying in a pan or using an air fryer yields that wonderfully crispy texture that makes cheesy garlic chicken wraps so irresistible.
How do I store leftover wraps?
For any leftover cheesy garlic chicken wraps, it’s best to refrigerate them in an airtight container. They will stay fresh for up to 2 days. When you’re ready to enjoy them again, reheat in a skillet or air fryer to restore that crispy golden exterior. For more tips on meal prepping and leftovers, check out this meal prep guide.
What can I use instead of chicken?
If you want to switch things up or need a vegetarian option, consider using chickpeas or tofu seasoned with your favorite spices. For a heartier twist, shredded turkey bacon or chicken ham work wonderfully and add a unique flavor profile. Making these wraps your own is part of the fun!
Conclusion on Cheesy Garlic Chicken Wraps
In summary, cheesy garlic chicken wraps are not only a delight for your taste buds but also a breeze to prepare. With just a handful of ingredients, you can create a high-protein meal that satisfies and comforts. So whip up a batch today, and enjoy a delicious, filling meal that’s sure to impress!
Cheesy Garlic Chicken Wraps
Equipment
- non-stick pan
Ingredients
- 2 large tortillas regular or low-carb/high-protein
- 7 oz cooked chicken about 200 grams, chopped (rotisserie is great)
- 2 cloves garlic minced or grated (adjust to taste)
- 2 tablespoons light mayonnaise
- 1 tablespoon light Greek yogurt or plain yogurt
- 2 teaspoons hot sauce like Frank’s
- ¼ teaspoon salt
- 3 oz grated cheese about 90 grams (I used a cheddar blend)
- 1 unit green onion chopped
- olive oil spray
Instructions
- In a bowl, mix chopped chicken, garlic, mayonnaise, yogurt, hot sauce, and salt.
- Lay out your wrap. On the lower third of the tortilla, sprinkle about 2 tablespoons of cheese, then top with about ⅔ cup of the chicken mixture. Add another tablespoon of cheese and a sprinkle of green onion.
- Fold in the sides of the tortilla, then roll it up tightly from the bottom.
- Heat a non-stick pan over medium-high. Spray with olive oil.
- Place wraps seam-side down. Cook for 3–4 minutes per side until crispy and golden. Cover with a lid to help heat the inside.
- Slice in half and serve!
Leave a Reply