
Introduction to Home-Baked Japanese Cheesecake
If you’ve ever savored a slice of Japanese cheesecake, you know it’s a delightful treat! This unique dessert, often referred to as a Japanese cotton cheesecake, distinguishes itself from the classic cheesecake with its airy texture and lightness, resembling a soufflé. But what truly makes it so popular?
For many, a home-baked Japanese cheesecake is a symbol of comfort and nostalgia. Originating in Japan, it has taken dessert enthusiasts by storm globally, from cozy cafes to home kitchens. Its subtle sweetness and creamy yet fluffy flavor create a perfect balance that makes every bite a delightful experience. Although it derives its inspiration from traditional cheesecakes, the incorporation of whipped egg whites gives it that magical, airy quality.
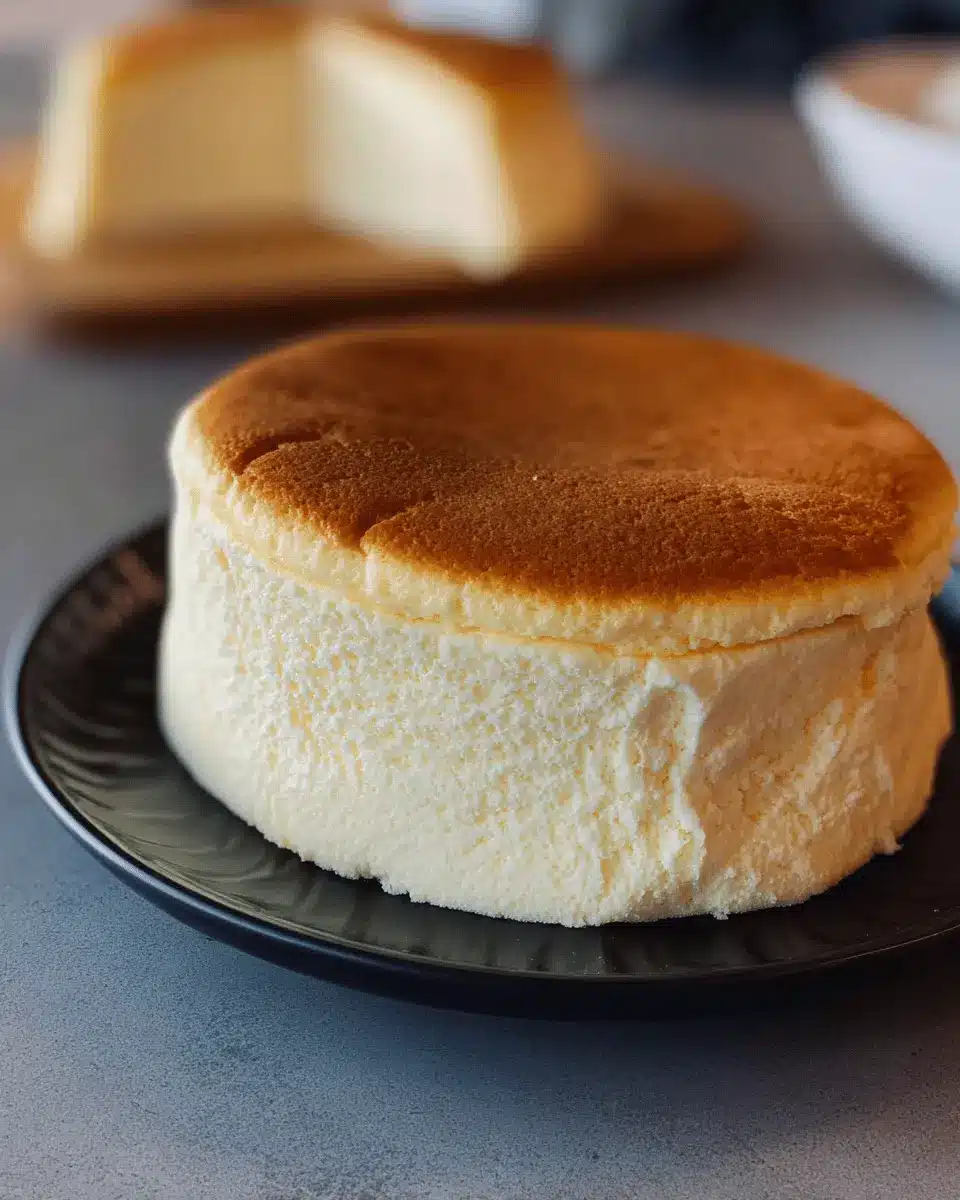
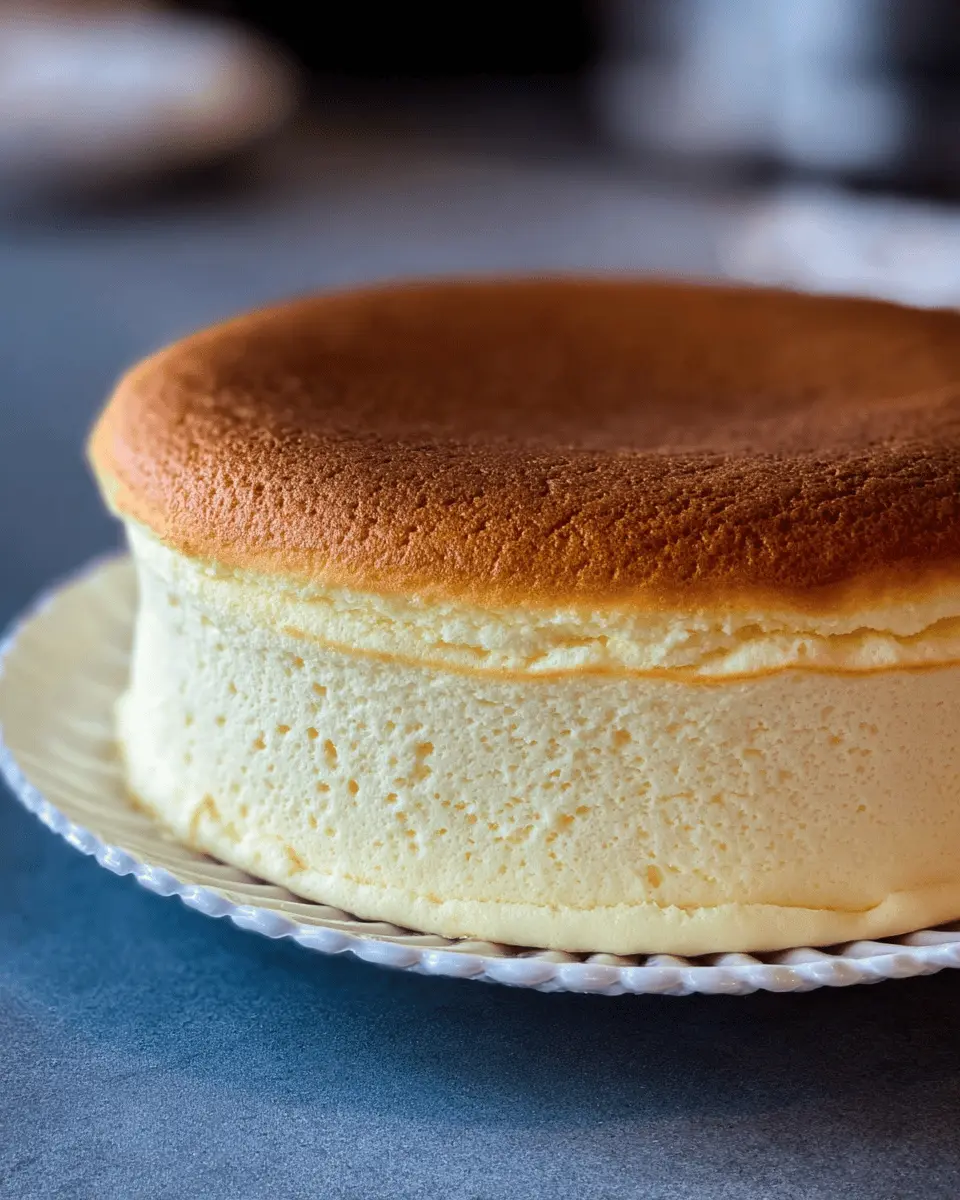
Have you ever wondered why so many flock to this dessert? It’s simple! The Japanese cheesecake is pleasing to both the eyes and the palate. It’s visually striking, with a golden top and a bouncing jiggle, and it effortlessly pairs with various toppings—from fresh fruit to a sprinkle of matcha. If you’re ready to dive into the world of baking, why not give this delightful recipe by Kat Lieu a try? Your friends and family will thank you!
Ingredients for Home-Baked Japanese Cheesecake
Essential Ingredients for the Batter
To create a light, fluffy home-baked Japanese cheesecake, you'll need just a handful of high-quality ingredients. Here's what to gather:
- Egg Whites: 5 large whites for that perfect meringue texture.
- Egg Yolks: 5 yolks provide richness and flavor.
- Cream Cheese: An 8 oz bar that should be at room temperature for easy blending.
- Butter: ¼ cup (preferably unsalted).
- Milk: ½ cup adds moisture; feel free to use alternatives like almond or soy milk.
- Sugar: Two types of fine sugar, with ¼ cup for the meringue and another ¼ cup for the batter.
- Cornstarch & Flour: 2 tablespoon of cornstarch (the "magic ingredient") and ¼ cup flour for structure.
Tips for Ingredient Substitutions
Don’t fret if you don’t have everything on hand! You can substitute:
- Gluten-Free Option: Swap regular flour with rice flour or Mochiko (sweet rice flour).
- Dairy-Free: Cream cheese alternatives or plant-based butter can work in a pinch.
- Flavor Add-Ins: Experiment with a dash of lemon juice or vanilla extract for unique flavor profiles.
Exploring these substitutions can lead to delightful variations while preserving that iconic Japanese cheesecake softness. For more ideas on ingredient swaps, check out Serious Eats. Happy baking!
Preparing Home-Baked Japanese Cheesecake
Creating a delightful home-baked Japanese cheesecake is about emphasizing kindness and patience in your baking journey. This unique dessert brings a light, airy texture combined with a rich flavor that has captivated many dessert lovers around the globe. Let's dive into the steps that will ensure your cheesecake is not just good, but absolutely fantastic.
Separate the eggs carefully
Start by gently separating the eggs. You want to handle this step delicately to avoid any yolk breaking into the whites. Place five egg whites in a separate mixing bowl and the yolks in another. This meticulous separation sets you up for success, ensuring that the egg whites can whip up to stiff peaks later. Remember, even the tiniest bit of yolk can prevent the whites from whipping properly.
Create the smooth batter
Next, you’ll prepare the cake batter, which is the heart of your home-baked Japanese cheesecake. In a small pot over low heat, melt together the cream cheese, butter, and ¼ cup of fine sugar. Stir until the mixture becomes smooth and creamy. This is a critical time to focus on getting a lovely, lump-free texture—seek perfection as you mix, because this will enhance the final flavor and texture of your cake.
Once melted, remove your pot from heat and gently whisk in the egg yolks. Gradually add the cornstarch and flour, mixing until everything is well combined. You’ll want this batter to be liquid and smooth with no lumps, making it a pleasure to bake.
Beat egg whites to stiff peaks
Now for the fun part! It’s time to whip the egg whites. Using a clean mixer bowl, add the egg whites and a splash of cream of tartar (or lemon juice for a zest of flavor). Start mixing on medium speed until soft peaks form, and then gradually introduce ¼ cup of fine sugar. Beat those whites until they reach stiff peaks, which will help your cheesecake achieve that signature airy lift. If you’ve never whipped egg whites before, don’t worry; it just takes a bit of practice.
Fold the mixtures together
When you've got stiff peaks, it’s time to embrace the gentle art of folding. Start by adding a scoop of the beaten egg whites to the batter. This helps lighten the batter, making it easier to fold. Carefully fold in the remaining egg whites, taking your time to combine everything without deflating the mixture. This step is crucial, as over-mixing can lead to a dense cake while under-mixing can cause unevenness.
Bake using the bain-marie method
For the final baking step, prepare your bain-marie. This method involves placing your cake pan into a larger pan filled with hot water, which helps create a moist baking environment and prevents cracks. Preheat your oven to 330°F and carefully monitor the baking time. You may end up adjusting the temperature slightly depending on your oven's strengths.
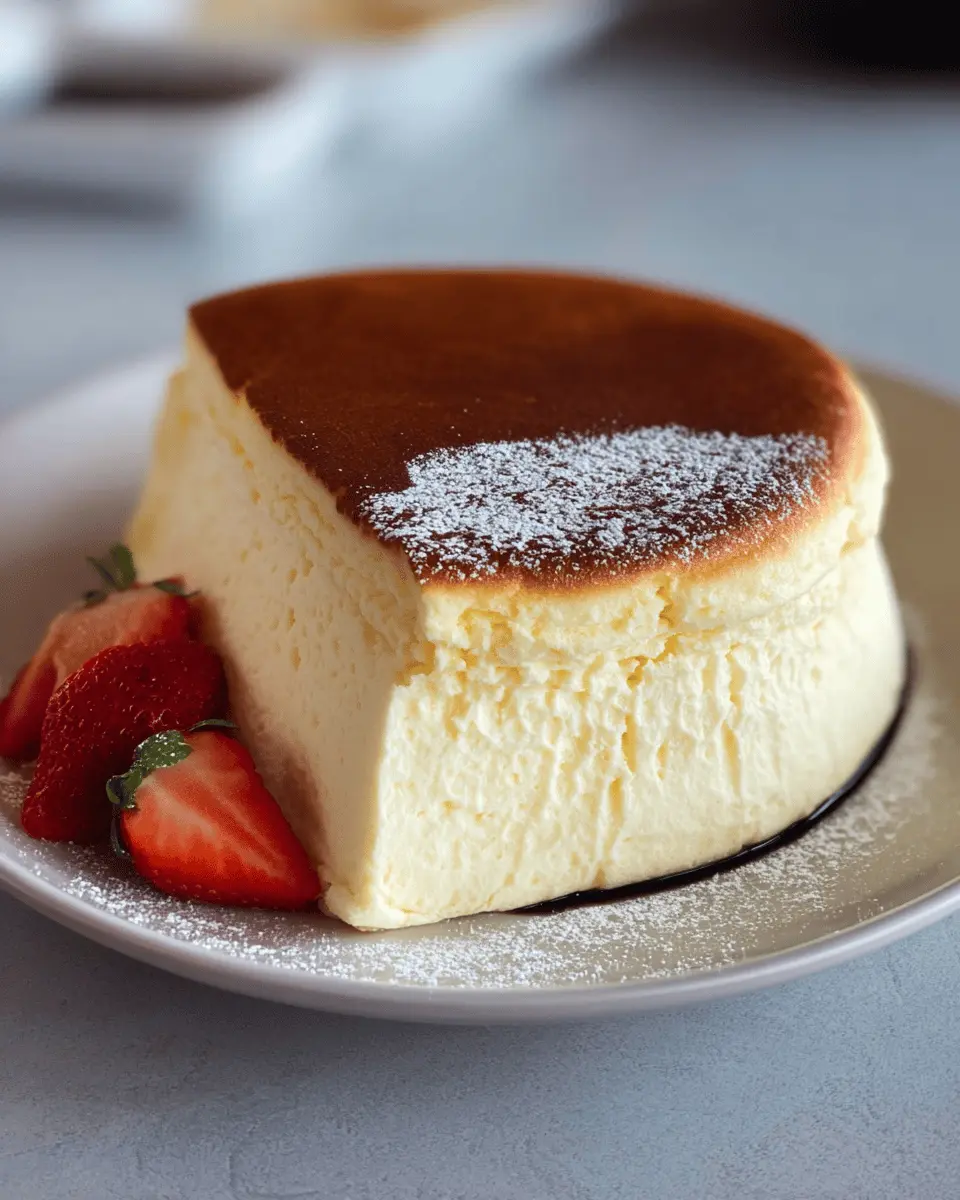
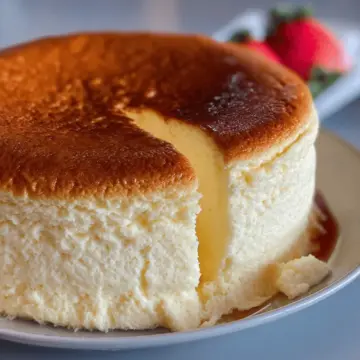
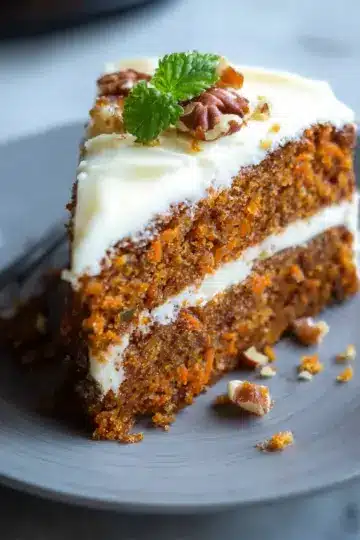
Enjoying a slice of your home-baked Japanese cheesecake, when it’s still warm or after a gentle chill in the fridge, becomes a truly rewarding experience. Serve it as is or with delightful toppings like strawberries or matcha powder for a special touch. Trust me, the balance of the fluffy texture and rich flavor will have your friends and family raving about your baking skills!
For more information on mastering different cheesecake techniques, check out Serious Eats for expert advice and tips. Happy baking!
Variations on Home-Baked Japanese Cheesecake
Exploring the world of home-baked Japanese cheesecake means diving into delectable flavor variations that can elevate this beloved dessert to new heights!
Flavor Variations: Lemon, Matcha, and Chocolate
- Lemon: Add a zing to your cheesecake by incorporating fresh lemon juice and zest. This bright flavor complements the creamy texture beautifully.
- Matcha: For a touch of tradition, blend in matcha powder. It not only adds a vibrant color but also infuses the cake with earthy, rich notes.
- Chocolate: Craving something indulgent? Gently fold melted dark chocolate into the batter for a luscious, decadent twist.
Gluten-Free Options and Toppings
- To create a gluten-free Japanese cheesecake, substitute regular flour with rice flour or Mochiko. It’ll still be fluffy and delicious.
- For toppings, get creative! Fresh strawberries, a sprinkle of confectioners' sugar, or a drizzle of honey can tantalize the tastebuds. Consider adding nuts or festive edible flowers for an extra pop!
These variations make your home-baked Japanese cheesecake not only versatile but also a canvas for your culinary creativity! If you're looking for more tips on baking perfect cheesecakes, check out resources from Serious Eats or The Kitchn.
Baking Tips and Notes for Home-Baked Japanese Cheesecake
Common pitfalls to avoid
Creating the perfect home-baked Japanese cheesecake is an art, and it’s easy to stumble along the way. Here are some pitfalls to sidestep:
- Overmixing the batter: Be gentle when folding in the egg whites—overmixing can cause your cheesecake to collapse.
- Incorrect oven temperature: A too-high temperature can lead to cracks. Invest in an oven thermometer to ensure accuracy.
- Not using room temperature ingredients: This can result in a lumpy batter. Allow your cream cheese and egg yolks to warm up before mixing.
Best baking tools and equipment
Having the right tools can make all the difference when baking. Here’s a quick checklist to help you get started:
- Stand mixer or hand mixer: Perfect for achieving stiff peaks in your egg whites.
- Bain-marie setup: A deep baking pan filled with water helps maintain humidity and prevents cracking.
- Parchment paper: Line your pans for easy removal post-baking.
- Digital kitchen scale: Accurate measurements ensure your ingredients are just right.
For more guidance on baking essentials, check out this article on essential baking tools from The Spruce Eats. Happy baking!
Serving Suggestions for Home-Baked Japanese Cheesecake
Presentation Tips: Garnishes and Pairings
Elevate your home-baked Japanese cheesecake with simple yet stunning garnishes. A drizzle of honey or a sprinkle of matcha powder can add depth. Consider topping it with fresh strawberries, blueberries, or even a tart raspberry coulis for a pop of color. Dusting it with confectioner sugar gives a sophisticated touch that pleases the eye.
Pair your cheesecake with a cup of steaming green tea or a refreshing glass of iced matcha. These beverages enhance the delicate flavors and provide a delightful contrast to the creamy texture.
Ideal Occasions for Serving
This light and fluffy dessert is perfect for various occasions:
- Casual Gatherings: Impress friends at your next dinner party.
- Celebrations: Serve as a centerpiece for birthdays or anniversaries.
- Afternoon Tea: Pair it with fruit and tea for a delightful afternoon treat.
No matter when or how you serve it, your home-baked Japanese cheesecake is sure to be a hit!
Time Breakdown for Home-Baked Japanese Cheesecake
Preparation Time
Set aside 20 minutes to gather your ingredients and prepare the batter for this delightful dessert. It's the perfect amount of time to get everything organized!
Baking Time
The baking process takes about 70 minutes. You'll love watching this fluffy cake transform in the oven as it rises to perfection.
Total Time
In just 1 hour and 30 minutes, you’ll have a stunning home-baked Japanese cheesecake ready to impress! Want to elevate your cheesecake-making skills? Check out resources from Serious Eats or BBC Good Food for more tips!
Nutritional Facts for Home-Baked Japanese Cheesecake
Approximate calories per slice
A slice of this home-baked Japanese cheesecake typically contains around 200-250 calories, making it a delightful yet indulgent treat for dessert lovers.
Protein content and other nutrients
Each slice also provides about 5-7 grams of protein, alongside a mix of vitamins and minerals from the egg yolks and cream cheese. Packed with calcium and essential nutrients, this cheesecake is as satisfying as it is enjoyable.
For more insights into nutritional specifics, check out resources like the USDA FoodData Central to explore the benefits of the ingredients you’re using!
FAQs about Home-Baked Japanese Cheesecake
Why is my cheesecake not rising?
If your home-baked Japanese cheesecake isn’t rising, it could be due to a few reasons. First, check your oven temperature; if it’s too low, the cake won’t puff up as expected. Additionally, ensure that your egg whites are beaten to stiff peaks—you need that airy structure to get the lift. Lastly, be gentle when combining the batter; over-mixing can deflate the air you worked so hard to create!
How can I ensure a fluffy texture?
To achieve a fluffy texture, focus on the meringue! Beating your egg whites with cream of tartar until stiff will incorporate air, creating a light structure. When folding the meringue into the batter, do it gently. This helps keep the air bubbles intact, leading to that signature jiggle and cloud-like consistency that makes Japanese cheesecake so special.
What’s the best way to store leftovers?
To keep your leftover home-baked Japanese cheesecake fresh, cover it loosely with plastic wrap and store it in the refrigerator for up to 3 days. If you want to enjoy it later, you can freeze portions wrapped tightly in plastic. Thaw them in the fridge overnight before serving to enjoy the same light texture! For more storage tips, refer to this guide.
Conclusion on Home-Baked Japanese Cheesecake
In conclusion, mastering a home-baked Japanese cheesecake can be a delightful experience! The light, fluffy texture and subtly sweet flavor make it a standout dessert for any occasion. Consider exploring various toppings to personalize your cheesecake. Get ready to impress your friends and family with this soft, jiggly treat!
The Best Home-Baked Japanese Cheesecake Recipe by Kat Lieu
Equipment
- mixer
- pot
- Baking Pan
- parchment paper
- oven
Ingredients
Egg White Meringue (Stiff Peaks)
- 5 eggs egg whites
- ¼ teaspoon cream of tartar or vinegar or lemon juice
- ¼ cup fine sugar Not confectioner sugar
Cake Batter
- 5 eggs egg yolks
- 8 oz cream cheese 1 bar
- ¼ cup butter
- ½ cup milk 125ml
- ¼ cup fine sugar
- 2 tablespoon corn starch magic ingredient
- ¼ cup flour use rice flour or Mochiko for gluten-free
- optional toppings strawberries, confectioner sugar, fruits, honey, matcha powder, etc.
Instructions
Preparation Steps
- Separate 5 beautiful eggs. Place the egg yolks in a bowl, and the egg whites in a mixer bowl.
- Place the butter, cream cheese and ¼ cup of fine sugar into a pot over low-heat. Allow the ingredients to melt, and mix together into a beautifully smooth batter mixture.
- Remove the pot from heat, and add the egg yolks into the batter mixture. Mix well, but gently.
- Add the cornstarch and flour. Once again, mix well. Clumps should disappear.
- Add milk and optionally vanilla extract or other flavors of your choice.
- Mix well. The batter should be smooth and liquid-y. You won’t have to strain this mixture.
- Set aside the batter as you beat the egg whites into stiff peaks.
- Pre-heat oven to 330F. Prepare a bain-marie by putting water in a deep rectangular baking pan or dish. Place into the oven.
- Prepare baking pans— with these ingredients, you can bake one 8-inch cake or two 6-inch cakes. Line the bottoms of the baking pans with circular parchment paper, and the inside sides with rectangular strips of parchment paper.
- Once you achieve stiff peaks, place some beaten egg white into the batter and mix together.
- Repeat the above step two more times.
- Pour the batter into the rest of the egg whites and mix together using folding techniques. You don’t want to over-mix or under mix.
- Pour the well-incorporated, but not over-mixed batter into the baking pan(s).
- Bake bain-marie style for 25 minutes at 330F. Adjust temperature if cake is not rising.
- After 25 minutes, crack open the oven door slightly for 10 seconds and lower the temperature to about 245-265F, bake for an additional 45 minutes.
- Allow your cake to rest in the oven after baking for about 10 minutes.
- Remove from the oven. Be careful and use oven mitts as needed.
- Place a sheet of parchment paper over the cake. Place a plate over the cake and parchment paper. Flip the cake upside down so the top of it is now the bottom.
- Remove the wet parchment paper from the cake, replace the bottom parchment paper of the cake.
- Now place another plate— the presentation or serving plate, on top of the cake. Carefully flip the cake again.
- Play with the bouncy jiggly-ness of the cake. Serve when still warm, or chill in the fridge.

Leave a Reply