
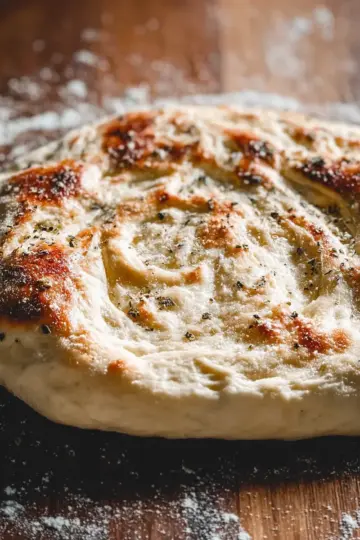
Introduction to Bisquick Sausage Balls
If you're a young professional juggling a busy lifestyle, you know how precious time is. Enter: Bisquick sausage balls. These delightful bite-sized snacks come together in just a few minutes and bake up beautifully in the oven, making them a perfect solution for quick appetizers or unexpected gatherings.
Why Bisquick Sausage Balls are a Game-Changer for Young Professionals
In today's fast-paced world, convenience is key, and bisquick sausage balls deliver just that. Picture this: You're rushing home from work, and your friends decide to stop by. Instead of scrambling for snacks, you can whip up a batch of these savory bites that are both impressive and delicious!
- Minimal prep time: With just 15 minutes of prep, you can have these ready in no time.
- Flexibility: You can easily alter the ingredients—for instance, use turkey bacon or chicken ham—making them adaptable to various dietary preferences.
- Crowd-pleaser: Who can resist a flavorful, cheesy, meaty ball? They’re perfect for parties, game days, or simply snacking at home.
So next time you need a hassle-free dish that packs a punch, remember these bisquick sausage balls; they might just become your new go-to! For more information on safe pork handling practices, check out the USDA guidelines.

Ingredients for Bisquick Sausage Balls
Making delicious Bisquick sausage balls is a breeze when you have the right ingredients on hand. Let’s break down what you’ll need to create these flavorful bites.
Essential Ingredients
To whip up a batch of Bisquick sausage balls, you'll need the following essentials:
- 2 cups Bisquick: This versatile mix provides the perfect base for our sausage balls.
- 1 pound beef sausage: Choose your favorite brand for a tasty, meaty flavor.
- 16 ounces sharp cheddar cheese, grated: The cheese adds richness and a delightful sharpness.
- ½ cup milk: This ingredient helps bind everything together and keeps your balls moist.
- 1 ½ teaspoons Italian seasoning: A little seasoning goes a long way in enhancing the flavor.
Optional Additions for Extra Flavor
Want to take your Bisquick sausage balls to the next level? Consider these tasty additions:
- Chopped green onions or chives: A fresh bite can really elevate those flavors.
- Crumbled bacon or turkey bacon: Adds that irresistible smokiness.
- Hot sauce or red pepper flakes: For those who love a little heat in their snacks.
Feel free to mix and match based on your preferences! Enjoy the creative process and make these balls your own.
Preparing Bisquick Sausage Balls
Making Bisquick sausage balls is a fun, straightforward process that yields delicious, savory snacks perfect for any gathering. They come together in no time and are sure to be gobbled up by your guests. Let’s walk through the steps to get you baking these delightful treats!
Gather Your Ingredients
Before you dive into cooking, having everything ready makes life so much easier. For this recipe, you’ll need:
- 2 cups Bisquick
- 1 pound of beef sausage
- 16 ounces of sharp cheddar cheese, grated
- ½ cup milk
- 1 ½ teaspoons of Italian seasoning
Make sure you have good quality cheddar cheese for that mouthwatering flavor and texture. Grating it yourself (as tedious as it might seem) can significantly boost the taste compared to pre-shredded cheese.
Preheat Your Oven
Once you’ve gathered your ingredients, it’s time to get that oven warming up! Preheat your oven to 350ºF (177ºC). This ensures that your bisquick sausage balls start cooking immediately when you place them inside, resulting in perfectly browned outside and moist inside. While the oven is heating, you can prepare your baking dish.
Mix the Ingredients Together
Now for the fun part! In a large mixing bowl, combine all of your ingredients. It’s best to use your hands for this step—trust me, getting a little messy is part of the process. You’ll want to mix everything until it’s evenly blended, ensuring that the cheese, sausage, and seasoning mingle together beautifully. This is also the moment to think about any variations; feel free to experiment with different seasonings or cheese for unique flavors!
If you're looking for more cooking tips, you can check out this guide to seasoning meat.
Shape and Portion the Balls
Once your mixture is ready, it’s time to shape those mouthwatering balls. Using a cookie scoop or your hands, form the mixture into 1-inch balls. Be sure to squeeze them gently so they hold their shape well during baking. Lay them in a single layer on a rimmed baking sheet that you can spray with non-stick cooking spray first.
Bake to Perfection
Now the moment you’ve been waiting for: baking! Place your baking sheet in the preheated oven and let them bake for about 20 to 25 minutes. You’ll know they are done when they turn a lovely golden-brown and are cooked through (the internal temperature should reach 160ºF). Keep an eye on them; a little patience goes a long way in ensuring your bisquick sausage balls come out perfectly!
Once they're finished, let them cool slightly before digging in. You can serve them warm, ideal for dipping into spicy mustard or your favorite sauce! Try these at your next party; I promise they will be a hit!

Variations on Bisquick Sausage Balls
There’s something about Bisquick sausage balls that invites creativity! Let’s explore some fun variations that will elevate your snacking game.
Turkey Bacon and Cheese Variation
Replace traditional sausage with turkey bacon for a lighter option. Simply cook the turkey bacon until crisp, crumble it, and mix it with the other ingredients. This version is not only lower in fat but still packs a punch in flavor. Serve with your favorite dipping sauce!
Chicken Ham Version for a Twist
For a delightful twist, use chicken ham in place of beef sausage. The sweet, smoky flavor of chicken ham complements the cheese, creating savory bites that are perfect for parties. Pair these with honey mustard for an extra layer of taste!
Vegetarian Sausage Alternatives
For those seeking a meatless option, try substituting with vegetarian sausage or finely chopped mushrooms and beans. This alternative maintains the savory essence of bisquick sausage balls while making it inclusive for your vegetarian friends. Consider incorporating nutritional yeast for added flavor and protein!
Get creative and enjoy these variations for your next gathering!
Cooking Tips and Notes for Bisquick Sausage Balls
Ensuring Proper Beef Safety
When working with raw beef, it's essential to maintain safe handling practices. Always check that your bisquick sausage balls reach an internal temperature of 160°F to ensure they're fully cooked. If you're using frozen sausage, they can sometimes look done on the outside but remain raw inside. A meat thermometer is your best friend in this case!
Keeping Sausage Balls Warm for Serving
To keep your bisquick sausage balls warm and delicious during gatherings, consider using a slow cooker. Set it to ‘warm’ while you bake the balls, and transfer them right from the oven. This way, they'll stay toasty for your guests to enjoy!
Adjusting for Dietary Preferences
If you have guests with specific dietary needs, you can easily modify the recipe. For a lower-fat option, swap out regular sausage for turkey or chicken sausage. You can also substitute the cheese for a dairy-free alternative to cater to those who are lactose intolerant. It's easy to make these flavorful adjustments while still delivering a satisfying treat!

Serving Suggestions for Bisquick Sausage Balls
Ideal Dips and Sauces
Ready to take your Bisquick sausage balls to the next level? Pair them with a variety of dips! Classic choices include:
- Honey Mustard: A sweet and tangy delight.
- Ranch Dressing: Always a crowd-pleaser, creamy and rich.
- Sriracha Mayo: For those who love a spicy kick.
Feel free to experiment! You can even create a cheesy dip by melting cream cheese with shredded cheddar and a dash of garlic powder for an indulgent treat.
Creative Plating Ideas for Snacks
How you present your Bisquick sausage balls can elevate your appetizer game. Consider these creative plating ideas:
- Skewers: Thread sausage balls on toothpicks for easy grabbing.
- Mini Muffin Tin: Arrange them in a muffin tin filled with colorful veggies for a vibrant display.
- Garnish: Sprinkle fresh herbs like parsley or chives on top to add a pop of color.
These simple yet thoughtful touches can make your dish irresistible at parties! Want more tips? Check out Food & Wine for more inspiration.
Time Breakdown for Bisquick Sausage Balls
Preparation Time
Getting your ingredients ready for these delicious Bisquick sausage balls takes just 15 minutes! It’s a quick process—just gather your Bisquick, beef sausage, cheese, and a few other simple ingredients.
Cooking Time
Once everything is prepped, you’ll slide them into the oven. In 20 minutes, they’ll transform into fragrant, golden-brown snacks that you can’t wait to eat!
Total Time
Add it all up, and you’ll be enjoying a tasty batch of Bisquick sausage balls in just 35 minutes. Perfect for a last-minute appetizer or a cozy night in!
Additional Tips
- For more details on safety measures when handling raw beef, check out the USDA's food safety guidelines.
- If you’re hosting a gathering, consider keeping the balls warm in a slow cooker for easy serving.
Now, go ahead and make these irresistible little bites—you won’t regret it!
Nutritional Facts for Bisquick Sausage Balls
Calories Per Serving
If you're curious about the calorie count, Bisquick sausage balls come in at about 173 calories per serving. This makes them a filling yet manageable option for gatherings or snack time. Whether you're indulging in just a few or munching on them throughout the day, you can enjoy them without too much guilt!
Key Nutrients to Consider
These tasty bites not only satisfy your cravings but also deliver key nutrients. Each serving of Bisquick sausage balls contains:
- Protein: 8g – essential for muscle repair and growth.
- Fat: 12g, with Saturated Fat: 5g – important for energy but should be consumed in moderation.
- Cholesterol: 29mg – be mindful if you're monitoring your intake.
- Sodium: 370mg – ideal to limit for heart health.
- Calcium: 148mg – supports bone health, thanks to the cheese.
For more detailed information on healthy dietary choices and maintaining a balanced diet, you may want to check out ChooseMyPlate.gov or consult resources from the CDC.
Now you can enjoy your Bisquick sausage balls while being aware of their nutritional benefits—perfect for your next gathering!
FAQs about Bisquick Sausage Balls
Can I Make These Ahead of Time?
Absolutely! Bisquick sausage balls are an excellent make-ahead snack. You can prepare the mixture and shape the balls, then cover them tightly and refrigerate for up to 24 hours before baking. If you're really short on time, you can also freeze the uncooked balls; just pop them in the oven straight from the freezer, adding a few extra minutes to the baking time.
What if I Don’t Have Bisquick?
No worries if you find yourself without Bisquick! You can create your own substitute by mixing 2 cups of all-purpose flour with 2 teaspoons of baking powder and ¼ teaspoon of salt. This works great in the recipe and will yield delicious sausage balls just like the original.
How Do I Store Leftover Sausage Balls?
To keep your leftover Bisquick sausage balls fresh, place them in an airtight container in the refrigerator. They’ll stay tasty for about 3 to 4 days. When you're ready to enjoy them again, simply reheat in the oven or microwave. For longer storage, consider freezing them; they can be stored in a freezer-safe bag for up to 2 months. Enjoy them any time!
Conclusion on Bisquick Sausage Balls
Final Thoughts on Making Homemade Snacks
Bisquick sausage balls are a quick and satisfying snack for any occasion. Whether hosting a gathering or craving a tasty treat, these bite-sized delights are perfect for dipping and sharing. Feel free to customize the recipe with your favorite spices or cheeses for a personal touch. Enjoy!

Bisquick Sausage Balls
Equipment
- oven
- mixing bowl
- cookie scoop
- baking sheet
Ingredients
- 2 cups Bisquick
- 1 pound pork sausage
- 16 ounces sharp cheddar cheese, grated
- ½ cup milk
- 1 ½ teaspoons Italian seasoning Link to Italian seasoning
Instructions
- Preheat oven to 350ºF (177ºC). Spray a rimmed baking dish with nonstick cooking spray.
- In a mixing bowl, combine all ingredients. Using a cookie scoop, shape it into 1-inch balls, squeezing sausage balls so it will hold their forms. Place on the baking sheet.
- Bake until brown, about 20 to 25 minutes. Best served warm.


Leave a Reply