
Introduction to Okonomiyaki
What is okonomiyaki and why should you make it at home?
Okonomiyaki is a delightful Japanese savory pancake that is sure to impress your taste buds. The name itself translates to "grilled as you like it," highlighting its versatile nature. Essentially, it’s a mixture of flour, water, eggs, and various fillings such as cabbage, seafood, and meats, all cooked to golden perfection. What sets okonomiyaki apart is its toppings, which can include mayonnaise, savory sauce, and bonito flakes, adding layers of flavor and texture.
Why should you make this delicious dish at home? First off, it's incredibly customizable! Whether you prefer shrimp, chicken ham, or turkey bacon, you can create your okonomiyaki recipe tailored to your preferences. It’s a fantastic way to incorporate fresh ingredients and explore different flavors.
Making okonomiyaki can also be a fun activity to do with friends or family. Picture this: gathering around a hot griddle, chatting and grilling your own pancakes, each person adding their favorite toppings. If you're looking for a dish that combines fun, flavor, and versatility, give okonomiyaki a try! Plus, you can impress your guests with a unique culinary experience that transports them straight to Japan. For a deep dive into making this dish, check out our detailed recipe below!
Ingredients for Okonomiyaki
Essential ingredients for the perfect okonomiyaki
Creating a delightful okonomiyaki recipe starts with the right foundational ingredients. You'll need:
- 100g of flour: This forms the base of your pancake.
- ½ sachet of levure chimique: It helps to make the okonomiyaki fluffy.
- 1 oeuf: Essential for binding the ingredients together.
- 150g of meat or seafood: Choose your favorite, such as shrimp or chicken ham, for a savory touch.
- 2 feuilles de chou chinois: Adds crunch and balances the flavors.
- 1 sachet of dashi en poudre: This umami-rich ingredient is key to an authentic taste.
- Katsuobushi and aonori: For finishing touches that pack a flavor punch.
- Sauce okonomiyaki and mayonnaise Kewpie: These toppings are what elevate your dish to the next level!
Optional ingredients to customize your dish
Feel free to get creative! Here are some optional add-ins to personalize your okonomiyaki:
- Turkey bacon: For those who love a smoky, savory flavor.
- Cheese: A gooey twist that melts beautifully inside.
- Green onions: Fresh, zesty enhancement.
- Kimchi: For a spicy kick that adds depth.
- Various seafood: Like squid or octopus, for a seafood lover's dream.
Mix and match these ingredients to create your ideal okonomiyaki experience!
Preparing Okonomiyaki
Making Okonomiyaki at home can be such a delightful culinary adventure! Not only is it delicious, but it’s also customizable to your taste. Let’s walk you through each step to ensure your okonomiyaki turns out perfectly.
Gather Your Utensils
Before diving deep into this flavorful journey, it's essential to gather your utensils. Here’s what you'll need:
- A medium-sized mixing bowl
- A spoon for mixing
- An okonomiyaki spatula (this will be your trusty sidekick!)
- A frying pan or a griddle for cooking
Having everything ready beforehand makes the cooking process smoother. Plus, it’s more fun when you’re not scrambling for a spatula halfway through!
Prepare the Batter
Begin with the foundation of your okonomiyaki recipe, the batter. Start by combining the flour and baking powder in your mixing bowl.
- In a separate bowl, warm about 100ml of water and whisk in the dashi powder. Depending on your flavor preference, feel free to adjust the dashi amount—more dashi means a deeper umami flavor!
Next, pour the warm dashi mixture into your flour blend and crack in the egg. Give it a vigorous stir until you achieve a smooth batter. It should be thick but pourable—kind of like pancake batter.
Add Your Fillings
Now comes the exciting part—choosing your fillings! You can incorporate a variety of ingredients based on your mood or dietary needs. Options include:
- Chicken or turkey bacon (great for that smoky flavor)
- Shrimp or other seafood
- Shredded cabbage (a must-have for crunch)
- Green onions, or even mushrooms
Chop your chosen fillings and mix them into the batter, ensuring they are evenly distributed. This step is where you can get creative!
Cook the Okonomiyaki
Take your prepared batter to the cooking stage! Preheat your frying pan or griddle over medium heat and grease it lightly.
Pour a portion of the batter onto the skillet, shaping it into a round pancake. Cook for about 5 minutes on one side until golden brown, then flip carefully using your spatula. It may take a couple of tries to get the flip just right—don't worry, practice makes perfect!
Garnish and Serve
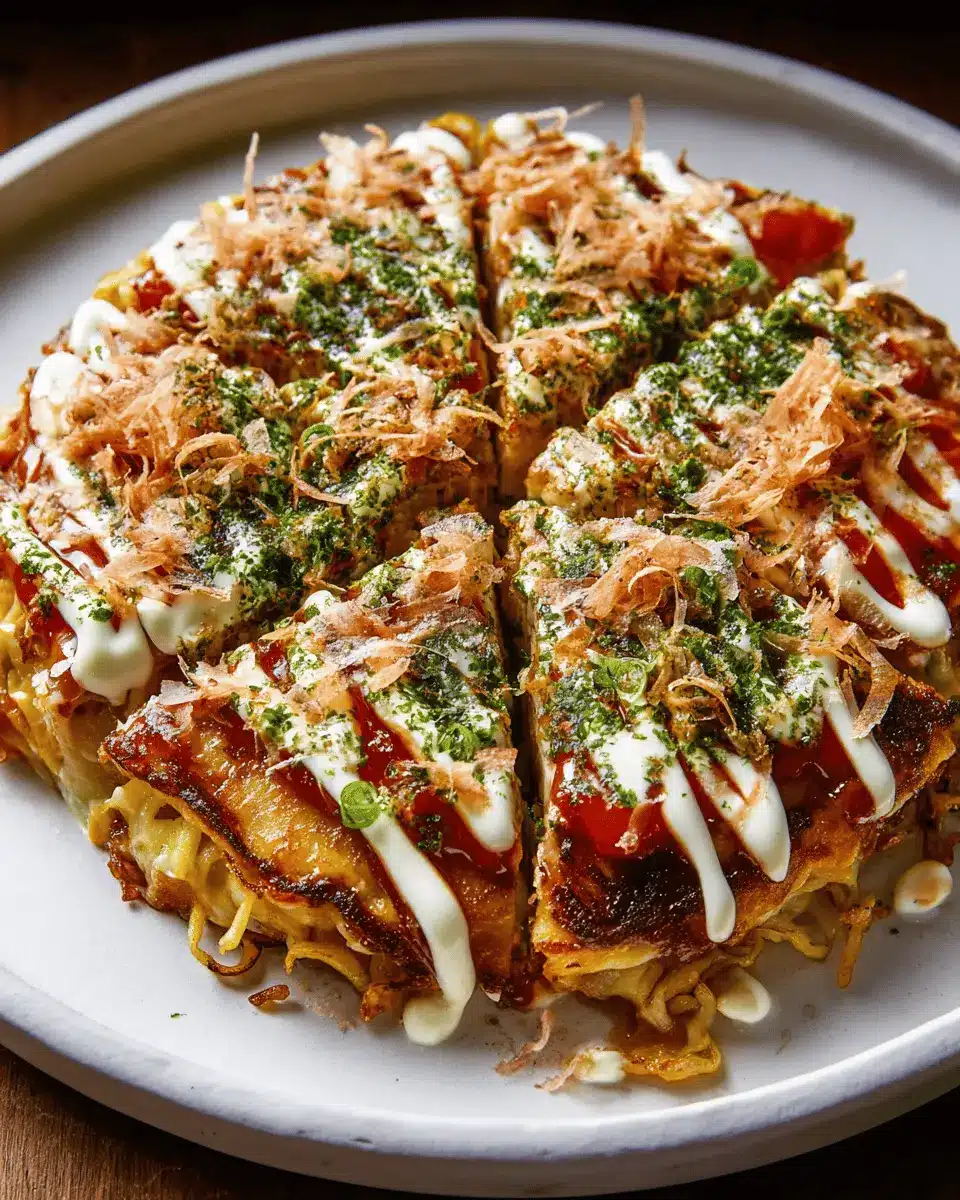
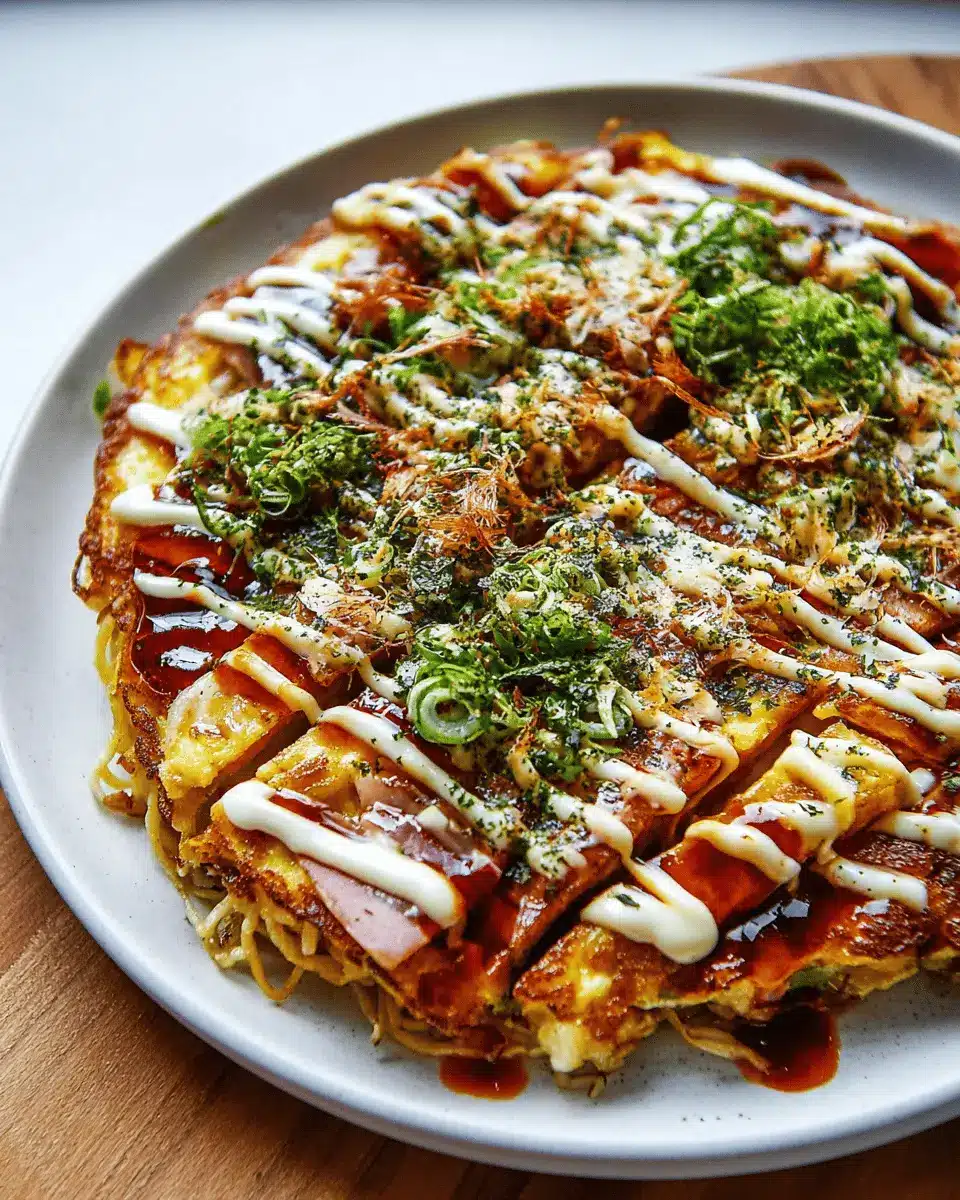
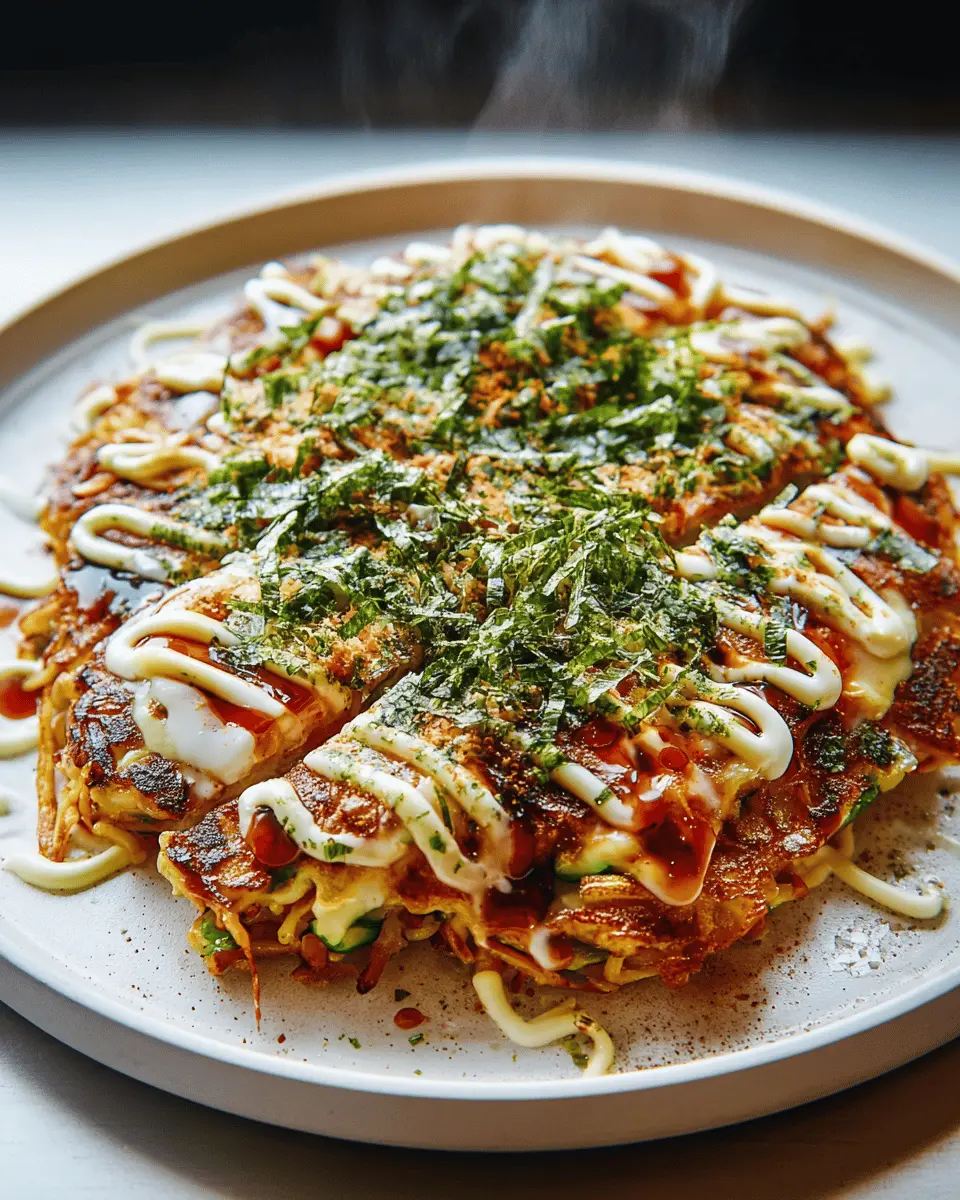
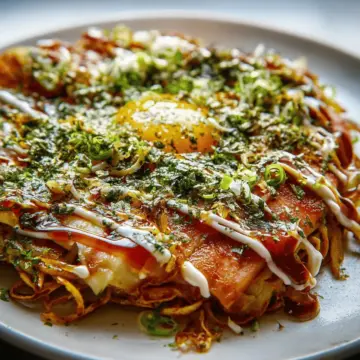
Once both sides are cooked to a crispy finish, it's time for the final touches. Drizzle the okonomiyaki sauce and Kewpie mayonnaise in a crisscross pattern on top. Feel free to get artistic—this is where it becomes visually appealing!
Finish with a generous sprinkle of katsuobushi and aonori for that authentic Japanese touch. Serve your delicious creation hot, and watch your friends and family awe at your cooking skills! Enjoy every bite!
For further inspiration on toppings and variations, check out sources like Just One Cookbook or Nami's Japanese Cooking. Happy cooking!
Variations on Okonomiyaki
Seafood Okonomiyaki
For seafood lovers, seafood okonomiyaki is a delightful twist on the traditional recipe. Imagine fluffy batter combined with fresh shrimp, squid, and maybe some scallops! The combination of textures and flavors makes each bite a celebration of the ocean. Simply mix your favorite seafood into the batter before cooking for a deliciously savory option. If you want to dive deeper into this variation, check out this comprehensive guide to seafood options for more inspiration.
Vegetarian Okonomiyaki
Not a fan of meat? No problem! Vegetarian okonomiyaki can be just as satisfying. Load up your batter with colorful vegetables such as bell peppers, carrots, and zucchini. You can also add some mushrooms for an earthy flavor. The key is to experiment with what you have on hand, making this a versatile dish perfect for using up leftovers. For tips on delicious vegetable combinations, visit this vegetarian resource to learn more about options that suit your taste.
Cooking tips for Okonomiyaki
Tips for achieving the perfect texture
For a delightful okonomiyaki recipe, achieving the right texture is key. Start with a smooth batter, ensuring your flour and dashi mixture are well combined. Don't overmix; a few lumps are perfectly fine! When adding your ingredients, incorporate them gently to maintain the fluffiness. A hot skillet is crucial—this helps create a crispy exterior while keeping the inside tender. For an added crunch, consider using finely chopped vegetables like cabbage or even carrots.
Common mistakes to avoid
One common mistake is overcrowding your okonomiyaki with fillings. Stick to a balanced ratio of batter to mixed fillings, allowing each ingredient to shine. Also, resist the urge to flip too early; letting it cook for a good 5 minutes on each side ensures even cooking. Finally, a slow and steady heat is preferable—too high, and you risk burning the outside before the insides are properly cooked. With these tips, your okonomiyaki will surely impress!
For more insights into mastering this dish, check out Serious Eats for expert advice and variations.
Serving suggestions for Okonomiyaki
Pairing with sides and beverages
When enjoying your okonomiyaki recipe, consider complementing it with light side dishes like pickled vegetables or a fresh salad. These will add a refreshing crunch that balances the richness of the pancake. For beverages, try serving it with warm miso soup or green tea, which beautifully enhance the umami flavors.
Presentation ideas for your okonomiyaki
Make your okonomiyaki visually appealing by garnishing it with a sprinkle of katsuobushi and aonori. Consider slicing your pancake into wedges for easy sharing. Plating it on a colorful dish not only invites excitement but also enhances the dining experience. You can even create a small dipping station with additional sauces for variation, making the meal interactive and fun!
For more inspiration on Japanese cuisine, check out Nami's Cooking Recipes for a delightful array of authentic dishes.
Time Breakdown for Okonomiyaki
Preparation Time
In just 10 minutes, you can have everything set and ready to go. That’s enough time to gather your ingredients and mix that delicious batter!
Cooking Time
Cooking takes only 10 minutes per okonomiyaki. Just enough time to get it crispy and golden brown on both sides.
Total Time
All in all, you’re looking at a quick 20 minutes from start to finish. Perfect for a weekday dinner or a fun weekend treat!
Curious to learn more about this delightful okonomiyaki recipe? Check out this guide on Japanese street food for some extra inspiration!
Nutritional facts for Okonomiyaki
Calories per serving
An average serving of okonomiyaki contains approximately 300-400 calories, making it a satisfying yet not overly indulgent choice. The calorie count can vary based on the ingredients and toppings you select, such as adding more meat or sauces.
Key nutrients
Okonomiyaki delivers a mix of essential nutrients, including:
- Protein: Thanks to the egg and any meat like chicken ham or turkey bacon.
- Fiber: From cabbage, which contributes to digestive health.
- Vitamins: A good source of vitamins C and K, enhancing immune function.
- Healthy fats: From the oils used in cooking and possibly from toppings.
This versatile dish is not only tasty but can also be quite nutritious when tailored to your dietary needs. For personalized variations, consider checking out resources like Healthline for more insights on balanced meals!
FAQs about Okonomiyaki
Can I make okonomiyaki gluten-free?
Absolutely! You can substitute the regular flour in the okonomiyaki recipe with a gluten-free blend. Look for a quality all-purpose gluten-free flour that mimics the texture of wheat flour. Additionally, ensure that your dashi powder and any other ingredients you use are also gluten-free to maintain the integrity of the dish.
How do I store leftover okonomiyaki?
If you find yourself with leftover okonomiyaki, don’t fret! Simply allow it to cool down, then wrap it tightly in plastic wrap or store it in an airtight container. It will stay fresh in the refrigerator for about 2-3 days. For longer storage, consider freezing your okonomiyaki. Just remember to separate layers with parchment paper to prevent sticking.
What is the best way to reheat okonomiyaki?
Reheating okonomiyaki can be easy and delicious! The best method is to place it in a skillet over medium heat, allowing it to warm through for about 5-7 minutes on each side. You can also pop it in the oven at 350°F (175°C) until heated. This will help maintain its lovely texture and make sure it’s as tasty as when you first made it!
Conclusion on Okonomiyaki
Why you should try making okonomiyaki today
Embracing this okonomiyaki recipe is an exciting culinary adventure. Not only is it delicious, but it's also versatile and can be tailored to your taste. Gather friends, share the experience, and enjoy a delightful meal that brings Japan right into your kitchen. Happy cooking!
Okonomiyaki
Equipment
- mixing bowl
- spatula
- Crepe pan or griddle
Ingredients
Dashi and Flour Mixture
- 100 ml water
- 10 g dashi powder
- 100 g flour
- ½ pack baking powder
- 1 piece egg
Main Toppings
- 150 g meat or fish
- 2 leaves Chinese cabbage
- 1 pack katsuobushi dried bonito flakes
- 1 pack Kewpie mayonnaise
- 1 pack Okonomiyaki sauce
- to taste aonori
- to taste bacon optional
Instructions
Cooking Steps
- Mix flour and baking powder in a bowl.
- Heat water and dissolve dashi powder, then add to flour mixture.
- Add egg to the mixture and stir until smooth.
- Finely chop the Chinese cabbage and mix into the batter.
- Add your choice of toppings (shrimp, chicken, bacon) and mix well.
- Cook on a medium heat in a pan or on a griddle until golden, about 5 minutes on each side.
- Flip using spatulas or a flipping tool.
- Drizzle with Okonomiyaki sauce and Kewpie mayonnaise in parallel lines.
- Garnish with katsuobushi and aonori, then serve.


Leave a Reply